Contact Star Anise Organic Wholefoods
 

Please use the form on the right to contact me!
I will get back to all enquiries as soon as possible.

Soulla x 


123 Street Avenue, City Town, 99999

(123) 555-6789

email@address.com


You can set your address, phone number, email and site description in the settings tab.
Link to read me page with more information.

Blog

This blog started as a way for me to share my recipes + culinary adventures, tips for vibrant health + happiness, thoughts on the latest developments in nutritional medicine + the low down on the Sydney wholefoods scene and beyond...

Filtering by Category: Desserts & Sweets

2-Ingredient Mango Jelly!

Becca Crawford

Super easy to make. Super delicious. Super nutritious. No added sugars. Perfect summer dessert. Kids love it (big ones too!).

There are 2 things you need to know about making jelly:

1. Using a quality source of gelatin powder is important. Gelatin is what makes the mixture gel or congeal. (It’s naturally found in the bones of animals and hence what makes a good bone broth look like jelly and stand on a spoon!). In terms of ready-made gelatin powders, I recommend Bernard Jensen or Great Lakes in the red container. I used the latter in this recipe.  Their beef gelatin powder is pure protein derived from the selective hydrolysis of collagen from the skin, connective tissue and/or bones of grass fed, free range beef cattle. This is the real deal. Just one ingredient: ground up collagen from pastured cows. No need to ever buy cheap processed imitation gelatin crap full of flavours, colours and preservatives from the supermarket again. Major brands will go unnamed.

2. Using the right amount of gelatin powder is important – and is a painstaking process of trial and error. Not adding enough makes a watery goo. Adding too much produces a hard rubbery texture that you could bounce a ball off (unless of course you’re after gummies or you could always simply say “Well, I intended to make gummies, of course”).  My mate Monty tells me that the consistency of jelly is all about tongue action. And then proceeded to give me a 10 minute explanation of how the tongue needs to be able to break the jelly apart with the right amount of effortless force. Indeed. Fortunately my mango jelly passed his test. Relief! But if you feel that the consistency of the jelly using my recipe is not to your liking (if your tongue just aint happy), then simply experiment by increasing or decreasing the amount of gelatin powder used.

Ok, let’s do it!

Ingredients:

1 cup of mango flesh 
1 tablespoon of 100% grass fed gelatin powder 

Directions:

Puree the mango flesh with a hand held blender. I do this in a measuring cup to determine the correct volume of mango.

Place pureed mango plus gelatin powder into a small saucepan over medium heat and mix ingredients with hand held blender until gelatin is dissolved and the ingredients are mixed well (this will only take a few minutes). The mixture should be warm – do not allow to simmer or boil. Pour into small vessels or a glass rectangular container and refrigerate until set (this only takes a couple of hours).

To serve:

Top with additional sliced mango segments and, if desired, thick mud cream or creme fraiche.

Serves approx 4.

Variations:

  1. For a creamier version (akin to panacotta), add 100ml of cream to the saucepan. Experiment with volume of cream to obtain your desired creaminess; and/or

  2. Add cubes of mango (and/or well-ripened pear) into the vessels/container after pouring in the mixture.

Health benefits:

Beef gelatin:

* Promotes healthy skin & hair.
* Improves joint & bone health.
* Improves quality of sleep when taken in the evening.
* Enhances digestion by strengthening the intestinal lining.

Adding a quality protein or fat source to fruit also helps to slow down the release of the fructose naturally found in fruit, avoiding the sugar high then crash.

I’ll be writing a post in the future on the difference between the Green and the Red containers of Great Lakes gelatin powder as I am asked about this frequently.

Greek Rice Pudding (Risoyalo)

Becca Crawford

Always a favourite dessert of mine growing up, I have fond memories of my mother frequently whipping up rice pudding dusted with cinnamon powder. I took her age-old recipe and made the necessary wholefood modifications to it and, after a few reiterations, I feel that I have nailed it and it’s ready to be shared. My kids can’t get enough of this one and have been taking it for morning tea to school. Just a warning, for anyone who loves a creamy comfort food, this is highly addictive!

img_3190.jpg


Risoyalo is delicious served warm or, to take advantage of the resistant starch properties of cooked and cooled white rice, serve at room temperature or cold from the fridge.  I recently wrote a blog post on benefits of resistant starch which you can read here. So this is yet another way to incorporate it into your diet. I know, what a hardship.

Ingredients:

1 cup (200g) med grain white rice, soaked in 2 cups of water overnight on bench
2 cups water (additional to the above)
the rind from ½ a lemon (slice off with a knife)
2 cups full fat milk
1/2 tablespoon (2 tsps) vanilla essence
¼ cup raw honey (or a combination of honey and maple syrup. I like using half and half)
cinnamon powder for dusting
4 egg yolks (optional), for extra nutrient-density

Directions:

Strain soaked rice and rinse in water.

Add 2 cups of water, rice and lemon rind to a saucepan. Cover and bring to a boil (should only take a few minutes). Lower heat, stir then recover and allow to gently simmer until rice is cooked and all of the water has been absorbed, stirring occasionally (approx 8 mins). Remove lemon rind with tongs.

Add milk, honey and vanilla. Stir occasionally, uncovered, on a gentle simmer until mixture thickens and most of the milk has been absorbed (approx 20 mins). Turn off heat and stir in egg yolks until well mixed.

Pour into individual ramekins or vessels and dust with cinnamon powder.

Keeps in refrigerator for several days.

Makes approx 10-12 x 100g servings.


You can not taste the addition of the egg yolks (something that was not in my mum’s traditional recipe). If anything, the texture is more rich and creamy with the yolks. They do give the pudding a yellow tinge instead of its usual white though!

Although I haven’t tried it, for a  dairy-freeversion I suggest using 2 cups of coconut milk instead of cows milk. If you try this coconut milk version let me know and next time I will make it with coconut milk and report back.

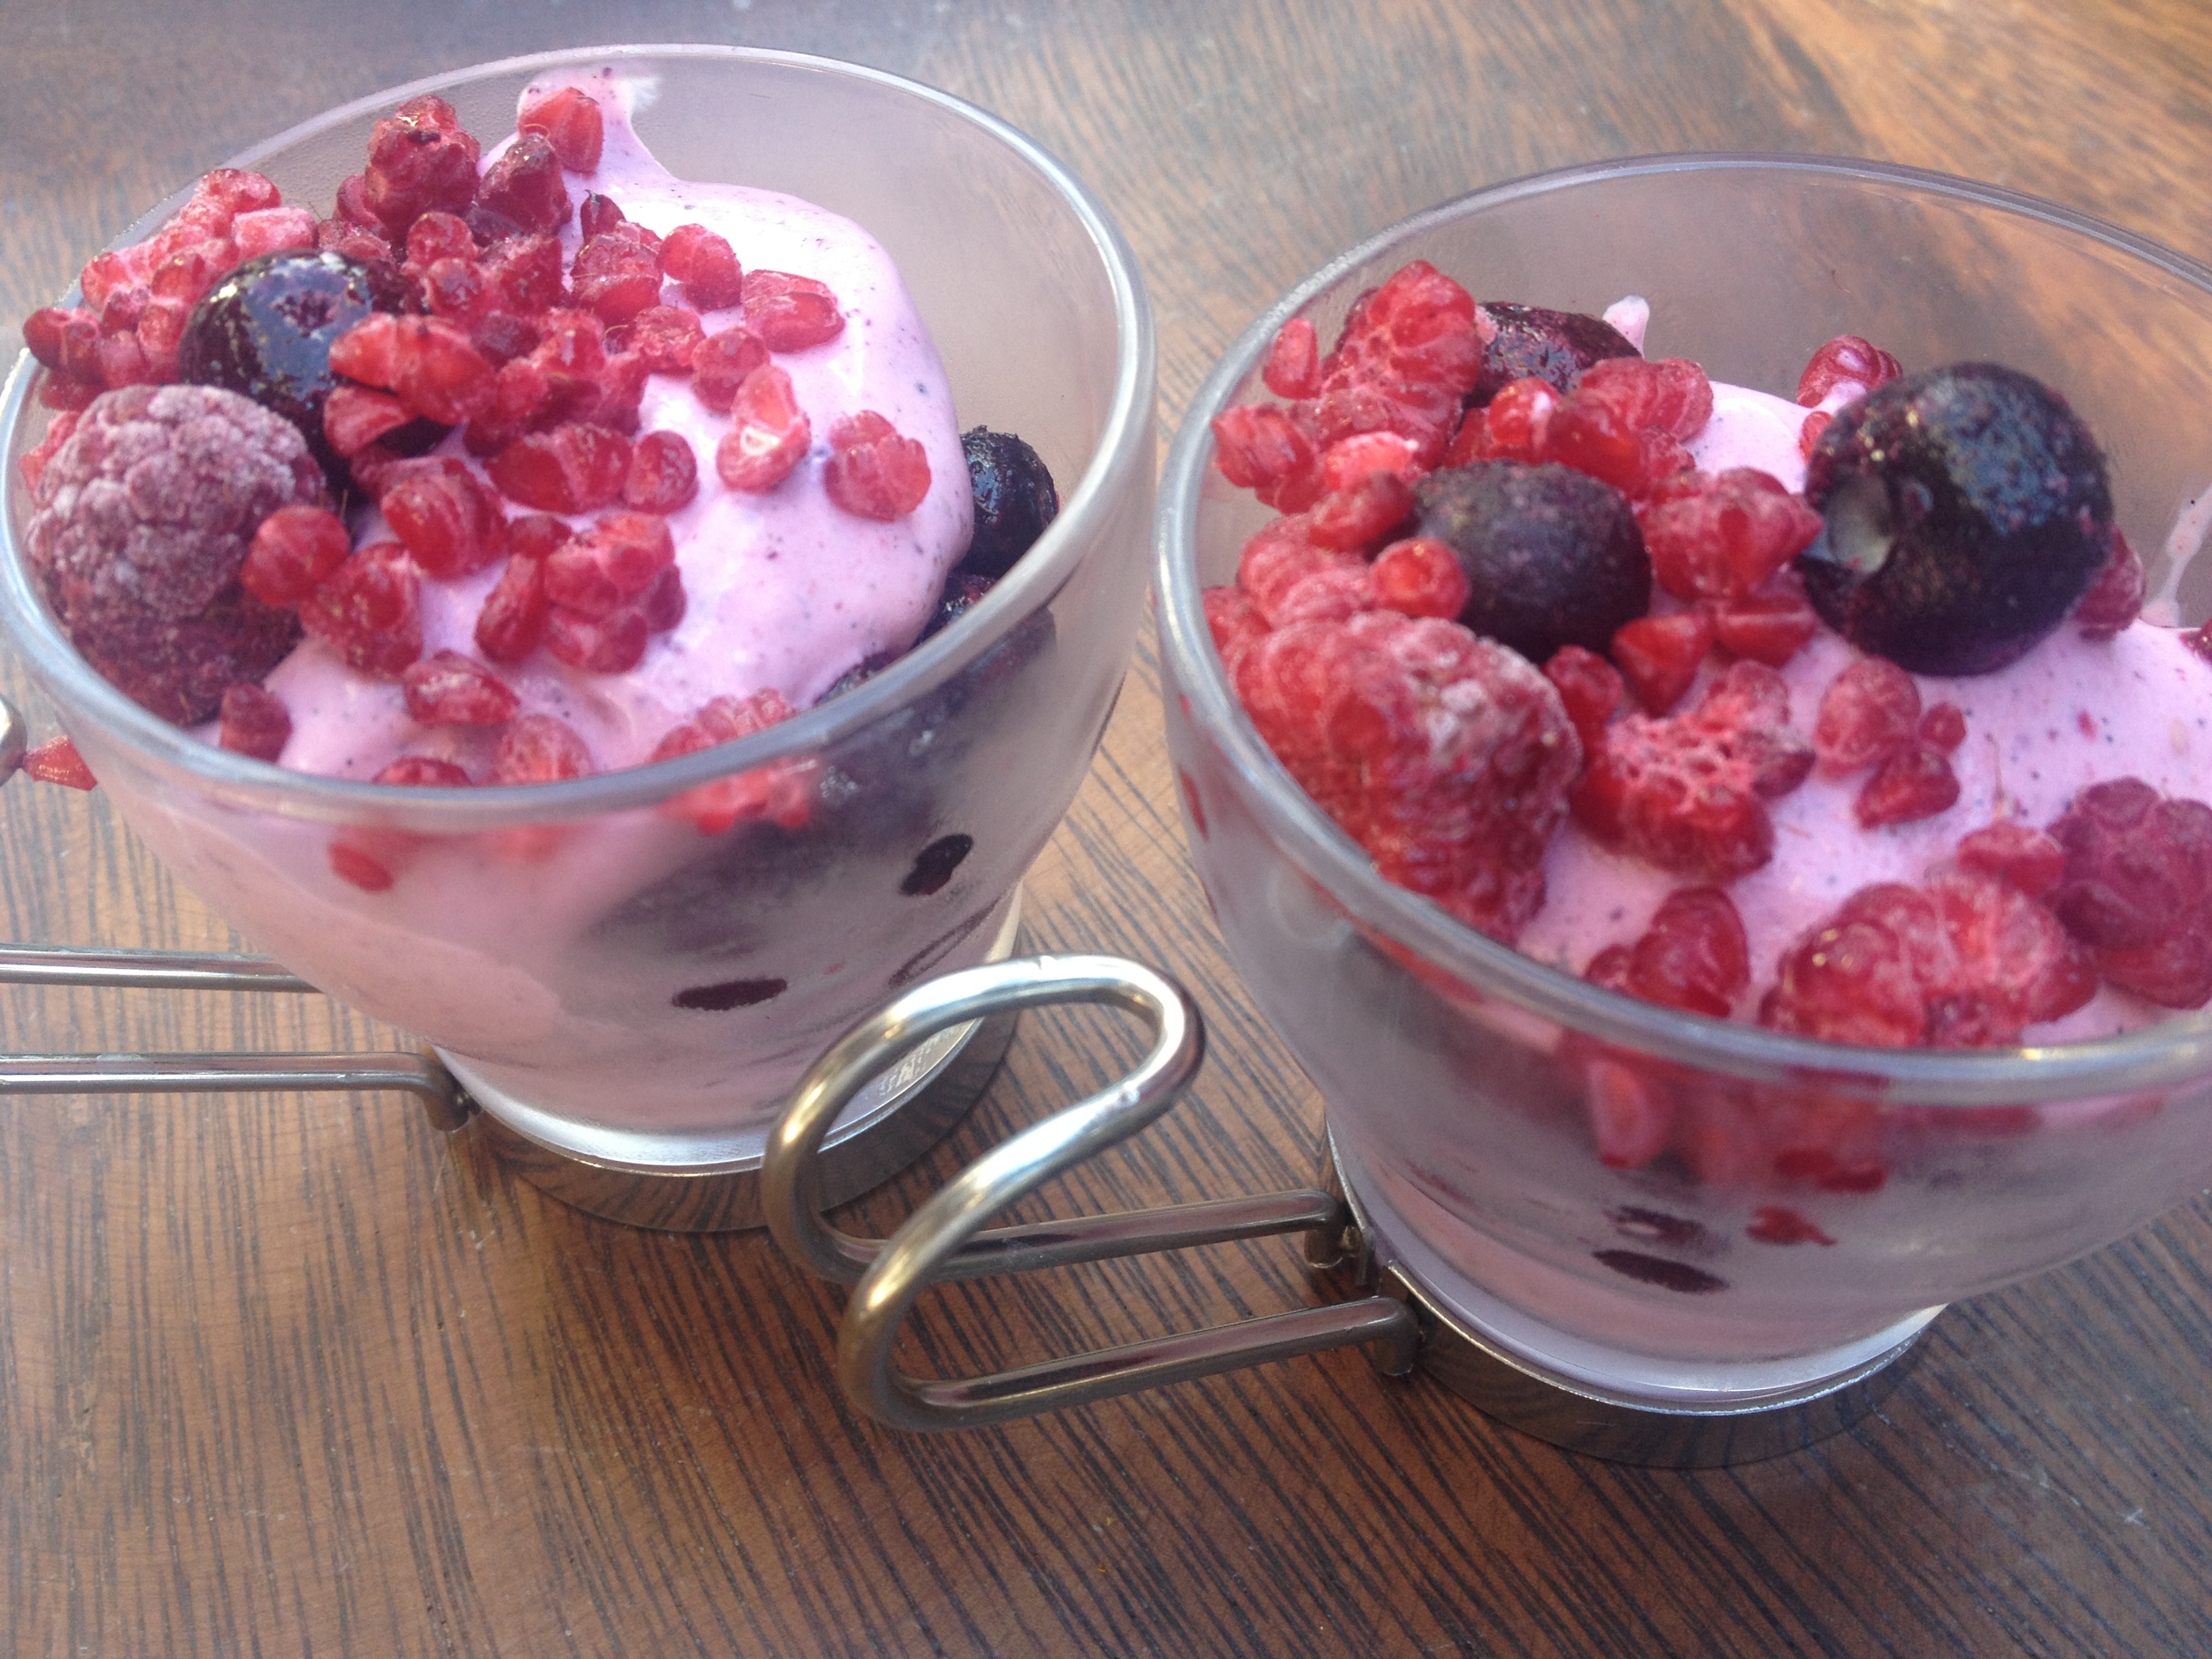
2-ingredient raspberry fool

IMG_2987

IMG_2987

Someone recently asked me if I get more excited about making main meals or desserts. The pragmatist in me initially retorted with "mains" because they are the staple and hence should be the focus. Deservedly so. But truth be told, when it comes to excitement, desserts win hands down. Why? Because they are decadent. And sweet. And because I've got a naughty streak. And because they are a little like magic- the end product (be it the cake, muffin, tart, ice-cream etc) doesn't resemble at all the raw ingredients that you started with (eg eggs, butter, cream, fruit etc), much unlike a casserole or other main which pretty much looks the same as the pre-cooked version.

IMG_2985

IMG_2985

Anyone who has been following my blog for some time will know that my food philosophy is all about teaming simplicity with nutrient density. Getting the most  nutrient-rich bang for as little possible time. Because we all have (and want) other things to do than spend all day in the kitchen! Any recipe that requires numerous ingredients or requires me to "beat egg whites until stiff" has lost me. Raspberry fool traditionally requires the cream to be beaten until stiff. You can certainly do this (and all the more power to you!) but I honestly don't think it's necessary for the time and effort spent and doesn't add much, if anything, to the flavour.

Here's my super quick 2-ingredient spin on this classic dessert:

2 cups (approx) of fresh or frozen raspberries (or mixed berries) 1 cup cream (or cream cheese or yogurt)

IMG_2986

IMG_2986

Blend (with handheld blender) 1 cup of the berries with cream until well mixed. Alternatively layer the creamed mixture with the plain berries in a glass ending with a scattering of berries on top. This serves 3-4 depending on size of cups. I made  espresso cup sized one for my 2 kids (see photo).

Over the years I've gradually reduced the need for sweeteners to the bare minimum- my body no longer craves it - so I still enjoy desserts without all the sugar. This dessert is sweet enough for me. But if you find it too tart and want a sweeter taste, add a drizzle (up to a tablespoon) of unrefined sweetener (eg maple syrup or raw honey) to the cream before blending.

I buy frozen berries from Woollies (refer to the 2 brands in the photo on above) because they are 1/2 the price of the same ones sold in organic stores. Along with wild tinned fish, frozen berries are the only other food item I buy from a supermarket. The rest is from organic stores or farmers markets. And as much as I like to support family run organic stores and farmers markets, the price differential when it comes to berries is significant enough that I justify  buying whoever is cheapest given the large quantity we go through on a daily basis. (I add frozen berries to our morning smoothie).

Stay tunes for more recipes, hot drinks and other ideas to keep warm this winter!